


Introduction: Cheap DIY Home Improvement Ideas
Everyone loves a good home makeover, but not everyone wants to break the bank to achieve it. In this article, we’ll dive into a myriad of cheap DIY home improvement ideas that will not only enhance your living space but also keep your wallet happy. From simple decor tweaks to more significant remodeling projects, these ideas are designed to be accessible, practical, and most importantly, budget-friendly. Whether you’re crafting unique home crafts or tackling larger improvements, there’s something here for every level of DIY enthusiast.
DIY Décor Enhancements: Small Changes, Big Impact
Creating a new vibe in your home doesn’t necessarily require major renovations. Small, thoughtful changes in your decor can make a significant impact. Here, we explore how to use color, texture, and clever design to breathe new life into your rooms.
Creating a DIY Gallery Wall
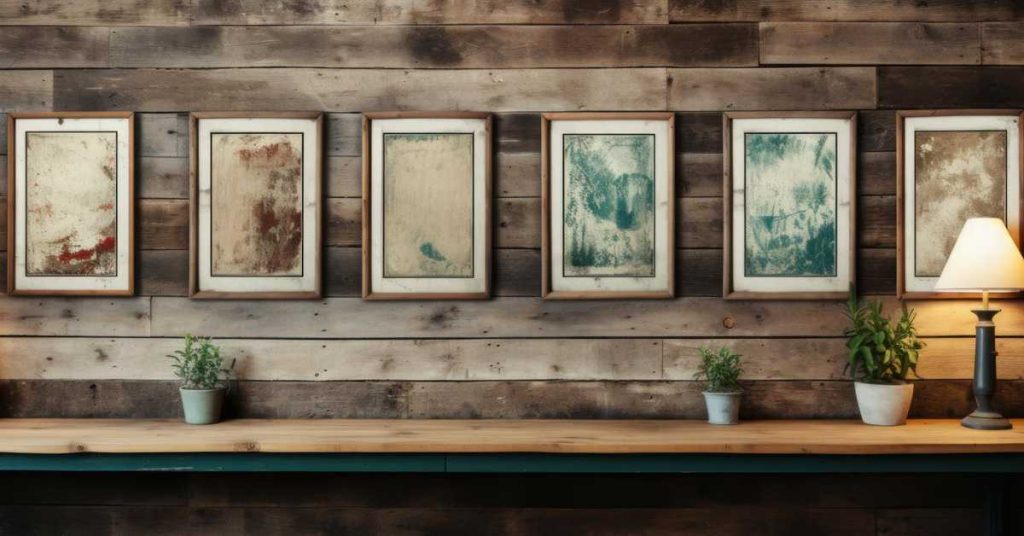
Creating a gallery wall is a wonderfully personalized way to enhance any space in your home, adding both character and charm. Not only does it showcase your unique sense of style, but it also allows you to display a collection of your favorite artworks, photographs, or even family memories. Here’s how you can create your own eye-catching gallery wall without overspending:
Selecting the Right Frames
The choice of frames can make or break your gallery wall. To start, consider the overall aesthetic you want to achieve. For a cohesive look, use frames of the same color and material. For a more eclectic vibe, mix and match different styles and finishes. Here are a few tips:
- Thrift Stores and Flea Markets: These places can be gold mines for finding unique and affordable frames.
- DIY Framing: Purchase frame pieces separately and assemble them yourself to cut costs.
- Uniformity: Using the same frame for every piece can unify different types of artwork.
Arranging Your Artwork
The arrangement of the frames can greatly influence the visual impact of your gallery wall. Here are some layout ideas to consider:
- Grid Formation: Perfect for a clean, modern look. Ensure all frames align perfectly both horizontally and vertically.
- Salon Style: This more traditional layout involves clustering various-sized frames closely together, often around a central piece.
- Linear Arrangement: Hang your frames in a straight line either horizontally or vertically. This works well in narrow spaces like hallways.
Choosing a Theme
A theme can tie the individual pieces together and create a story or a mood. Some theme ideas include:
- Color Scheme: Choose artwork that shares a specific color palette.
- Subject Matter: Perhaps you want to display only black-and-white photography, abstract art, or landscapes.
- Personal Elements: Including personal items like letters, postcards, or fabric swatches can add a sentimental touch.
Installation Tips
- Plan on Paper: Before you start hammering nails into the wall, use paper templates taped to the wall to visualize the layout.
- Level and Measure: Use a level to ensure your pictures hang straight, and measure the spaces between frames for even spacing.
- Wall Anchors: For heavier frames, make sure to use wall anchors to prevent any accidents and ensure your wall art stays securely mounted.
By following these guidelines, you’ll be able to create a gallery wall that not only reflects your personal taste but also enhances your living environment, all while maintaining a budget-friendly approach. Whether you choose a streamlined grid or an eclectic array of frames, your gallery wall is sure to be a focal point in your home that draws the eye and sparks conversation.
Revamping Furniture: Giving Old Pieces New Life
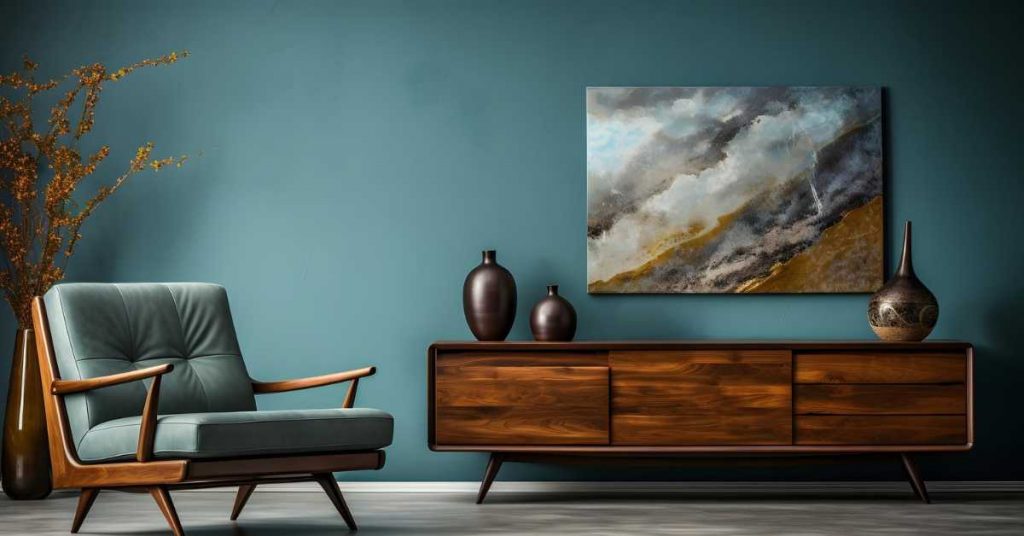
Revamping old furniture is not only economical but also environmentally friendly, adding a personal touch to your home decor. By reupholstering chairs, refinishing tables, and updating hardware, you can breathe new life into pieces that might otherwise be overlooked or discarded. Here’s a step-by-step guide to help you transform your old furniture into stunning, like-new pieces.
Reupholstering Chairs
Reupholstering is a fantastic way to refresh old chairs and make them a centerpiece in any room. Here’s how to do it:
- Choose Your Fabric: Select a fabric that complements the room’s decor but is also durable. Consider how the chair will be used and who will use it.
- Remove the Old Fabric: Carefully remove the existing fabric and staples using a staple remover and pliers. This will be your template for cutting the new fabric.
- Cut and Attach New Fabric: Lay your new fabric flat and place the old fabric on top to cut around it, leaving extra for stapling. Attach the fabric to the chair using a staple gun, pulling it taut to avoid wrinkles.
- Reattach Any Padding or Cushions: If the padding is worn out, replace it before stapling on the new fabric.
Refinishing Tables
Refinishing a table can restore its original beauty or give it a completely new look. Here’s the process:
- Prepare the Surface: Start by sanding the table down to remove old varnish or paint. Use a coarse sandpaper first, then finish with a finer grit for a smooth surface.
- Apply Stain or Paint: Depending on your preference, apply a wood stain or paint. Stain can enhance the natural wood grain, while paint can give your table a fresh, bold color.
- Seal the Finish: Once the stain or paint is dry, apply a clear coat of polyurethane to protect the surface and give it a glossy or matte finish, depending on your taste.
Updating Hardware
Changing the hardware on dressers, cabinets, and other furniture can modernize an outdated piece without much effort or cost.
- Choose New Hardware: Select new pulls and knobs that fit the style of the piece and the room. Hardware comes in a variety of styles and finishes, from sleek modern metals to vintage glass or ceramic.
- Remove Old Hardware: Use a screwdriver to remove old knobs and pulls.
- Install New Hardware: Screw in the new hardware. Make sure it’s tight and secure. If the new hardware doesn’t fit the old holes, you may need to fill the old holes with wood filler and drill new ones.
Tips for Success
- Quality Materials: Invest in high-quality fabrics and hardware. They last longer and can transform a cheap piece into a luxurious one.
- Tool Kit: Ensure you have all the necessary tools before starting. This might include screwdrivers, a staple gun, sandpaper, and brushes.
- Patience and Precision: Take your time with each step, especially when working with paint and stains. Rushed work often leads to mistakes.
By following these steps, you can not only save money but also create a piece of furniture that is uniquely yours, tailored perfectly to your home’s aesthetic and your personal style. This process allows you to keep beloved pieces that have history and sentimental value, all while contributing to a sustainable lifestyle.
Lighting: Setting the Mood Without the Price Tag
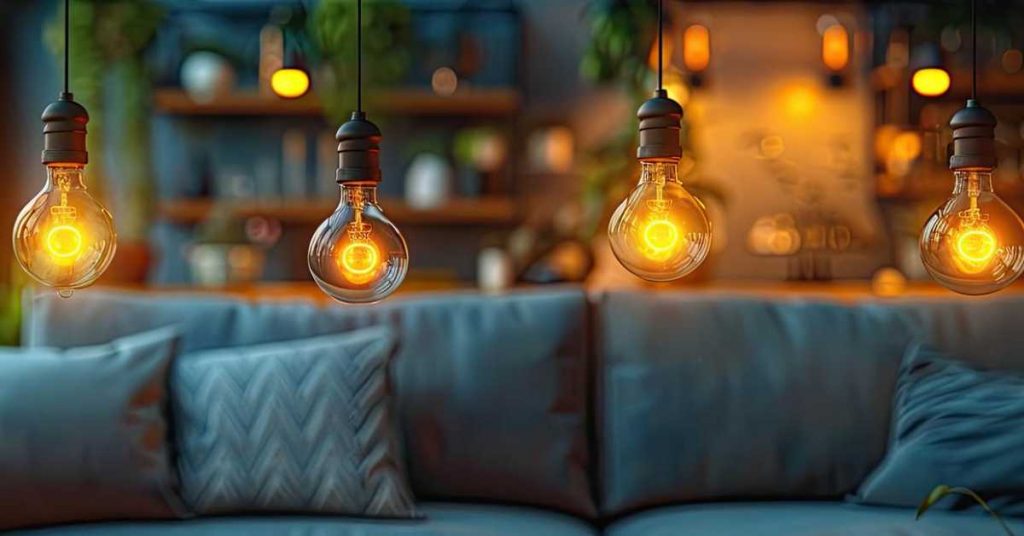
Good lighting is essential in defining the atmosphere and functionality of your home. It can enhance mood, create ambiance, and even influence well-being. Whether you’re aiming to add a cozy warmth or brighten a workspace, the right lighting solutions can make all the difference. Here’s how to select and install cost-effective lighting that will transform any space into a welcoming and functional area.
Selecting the Right Lighting
Choosing the right type of lighting depends on the function of the room and the mood you want to set. Here are key lighting types to consider:
- Ambient Lighting: This is the main source of light in a room, usually provided by ceiling fixtures, recessed lighting, or floor lamps. It creates a base level of light for general use.
- Task Lighting: Designed to help you perform specific tasks, such as reading, cooking, or working. Desk lamps, under-cabinet lights, and pendant lights over kitchen islands are good examples.
- Accent Lighting: Used to highlight architectural features or important elements like artwork, sculptures, or bookcases. Track lighting, spotlights, and wall-mounted fixtures are typical choices for accent lighting.
Cost-Effective Lighting Options
When it comes to budget-friendly lighting, there are several options that can offer both efficiency and style:
- LED Bulbs: While the upfront cost is higher than traditional incandescent bulbs, LEDs consume less energy and have a longer lifespan, saving money in the long run.
- Solar-Powered Lights: Ideal for outdoor lighting, solar lights are easy to install and require no running costs as they are powered by the sun.
- Smart Lighting Systems: Smart bulbs can be more expensive initially, but they offer the ability to control lighting remotely and customize settings, potentially saving energy by adjusting to your needs.
Installation Tips
Installing new lighting fixtures can be a straightforward DIY project if you follow safety protocols and have the right tools. Here’s a basic guide to installing a new light fixture:
- Turn Off the Power: Safety first! Always turn off the power at the circuit breaker before starting any installation to avoid electrical shock.
- Remove Old Fixtures: Unscrew and carefully remove the old light fixture. Detach the wire connections between the fixture and your home wiring.
- Connect the Wires: Connect the wires of the new fixture to your home wiring. Generally, you’ll connect black to black wires (hot), white to white wires (neutral), and green or bare copper to green or bare copper wires (ground).
- Secure the Fixture: Mount your new fixture according to the manufacturer’s instructions. Make sure it is securely attached to avoid any future accidents.
- Restore Power and Test: Once installed, turn the power back on and test your new light to ensure it works properly.
Enhancing Mood with Lighting
The right lighting can dramatically alter the mood of a room:
- Warm Lighting: For living rooms or bedrooms, warmer, softer lights create a relaxing and comfortable atmosphere.
- Bright, Cool Lighting: In kitchens, bathrooms, or home offices, brighter and cooler light is more practical and energizing.
Smart Lighting for Cost Savings
Investing in smart lighting solutions can also be a cost-effective strategy. These systems allow you to control lights via your smartphone or voice-controlled devices, enabling you to turn lights on and off remotely, dim lights as needed, and schedule lighting for specific times of day, which can help in reducing unnecessary energy consumption.
By carefully selecting and installing the right lighting, you can transform any space in your home not only to make it more functional but also to enhance its ambiance, making it a more enjoyable and efficient place to live.
DIY Kitchen Makeover on a Shoestring Budget
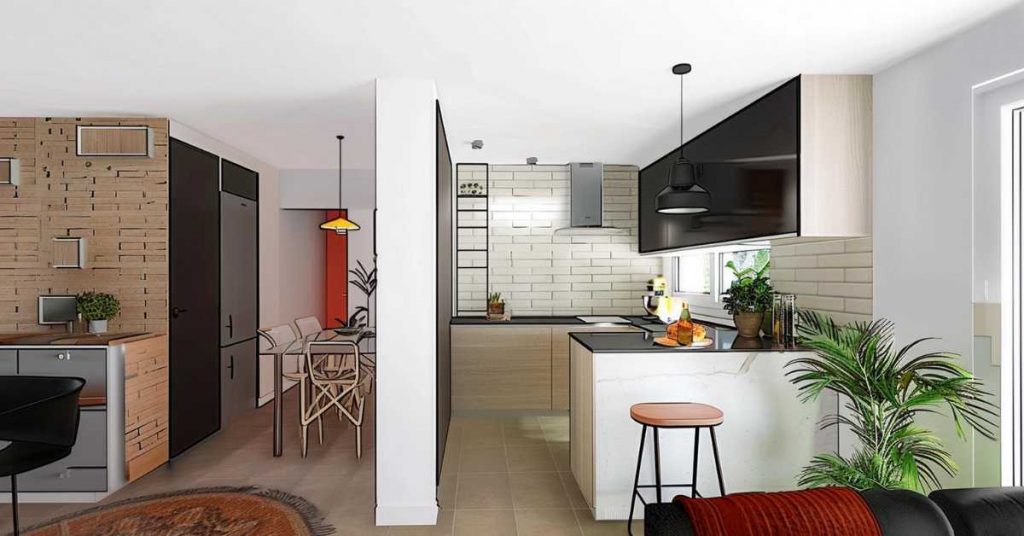
Updating your kitchen doesn’t have to involve a full-scale remodel that strains your finances. There are numerous cost-effective ways to refresh the heart of your home, making it a more enjoyable and functional space. Here are some simple, budget-friendly strategies to give your kitchen a new look without the high costs of a complete overhaul.
Painting Cabinets
One of the most impactful changes you can make in your kitchen is painting the cabinets. This can brighten up the space and give it a fresh, new feel without the expense of new cabinetry. Here’s how to do it effectively:
- Preparation: Remove cabinet doors and hardware. Clean all surfaces thoroughly to remove grease and dirt, as paint won’t adhere well to dirty surfaces.
- Sanding: Lightly sand the cabinets to remove the glossy finish and help the new paint stick better. Wipe down the dust afterward.
- Primer: Apply a good quality primer to ensure the paint adheres well and the color looks bright and even.
- Paint: Choose a semi-gloss or gloss paint designed for cabinetry because it’s durable and easy to clean. Apply at least two coats for a professional finish.
Replacing Hardware
New knobs, pulls, and handles can transform cabinetry with a minimal investment. Hardware comes in various styles and finishes, allowing you to add modern touches or vintage charm to your kitchen easily.
- Measure: Ensure that new hardware fits the existing holes, or be prepared to fill old holes and drill new ones if you’re changing styles.
- Style: Choose hardware that complements the overall theme of your kitchen. For example, brushed nickel handles can offer a sleek, modern look, while copper pulls can add rustic warmth.
Updating Countertops
While granite or marble might be expensive, alternatives like laminate or butcher block provide a fresh look at a fraction of the cost.
- Laminate: Modern laminate countertops are available in various styles, some of which mimic stone or wood, and are both durable and attractive.
- Butcher Block: Adding a section of butcher block can be a cost-effective way to add warmth and functionality to your kitchen.
Adding a Backsplash
A new backsplash can serve as a focal point in your kitchen, adding color and pattern. Peel-and-stick tiles are an excellent option for budget-conscious homeowners because they are easy to install and come in many designs.
- Plan Your Design: Measure the space and plan your design beforehand to ensure you purchase the correct amount of tiles.
- Installation: Peel-and-stick tiles are simple to cut and apply, making them a perfect DIY project that can be completed in a weekend.
Improving Lighting
Enhance your kitchen’s lighting by adding under-cabinet lighting or upgrading existing fixtures. Good lighting is essential in the kitchen for both aesthetics and functionality.
- Under-Cabinet Lighting: Install LED strip lights under cabinets for better task lighting and a modern look.
- Pendant Lights: Replace old pendant lights with new, stylish ones to make a statement and improve overhead lighting.
Organizing and Decluttering
Sometimes, a thorough decluttering can be as impactful as any physical update. Use shelf organizers, spice racks, and drawer dividers to make the most of your space and keep everything tidy.
DIY Decor Touches
Finally, add some personal touches:
- Open Shelving: Replace upper cabinets with open shelving to display decorative items and everyday dishes.
- Fresh Paint: Give your walls a new coat of paint in a color that complements your cabinetry and decor.
By tackling these updates, you can transform your kitchen into a space that feels brand new, all while keeping your budget intact. These changes not only enhance the look and feel of your kitchen but can also increase the functionality and efficiency of the space, making every cooking and gathering experience more enjoyable.
Backsplash Bonanza: Adding Style With Peel-and-Stick Tiles
Peel-and-stick tiles offer a versatile and cost-effective solution for updating the look of your kitchen or bathroom. They come in a variety of materials, including vinyl and metal, and an array of patterns and colors. This makes them an ideal choice for those looking to add a fresh style without the commitment or cost of traditional tiles. Here’s a comprehensive guide on how to select and apply peel-and-stick tiles for optimal results.
Choosing the Right Peel-and-Stick Tiles
1. Consider the Area of Application
- Moisture Resistance: For bathrooms and backsplashes in kitchens, choose tiles that are water and moisture-resistant to prevent peeling and mold growth.
- Heat Resistance: In kitchens, particularly near stoves, tiles should be able to withstand heat without warping or melting.
2. Assess the Style and Design
- Color and Pattern: Select colors and patterns that complement your existing decor. If your room has a neutral palette, consider tiles with bold patterns to add visual interest, or go for subtle designs that enhance the existing elements.
- Finish: Tiles come in various finishes, from matte to glossy or metallic. Decide what works best with your room’s lighting and design theme.
3. Quality and Durability
- Thickness: Thicker tiles tend to be more durable and offer better adherence.
- Adhesive Quality: Read reviews to choose tiles with reliable adhesive backing that won’t peel off easily after application.
Preparing to Install Peel-and-Stick Tiles
1. Surface Preparation
- Clean and Dry: Ensure the wall or floor is thoroughly clean, dry, and smooth. Wash the surface with a degreasing cleaner to remove any oil or residue, which could prevent the tiles from sticking properly.
- Repair Any Damage: Fill any holes or cracks with a spackling compound and sand the area smoothly. Peel-and-stick tiles adhere best to flat, smooth surfaces.
2. Tools and Materials
- Measuring Tape: To measure the area and tiles accurately.
- Utility Knife: For cutting the tiles to fit corners, edges, and around outlets.
- Level or Straightedge: To help place the tiles evenly and straight.
- Marker or Pencil: To mark where cuts are needed on the tiles.
Applying Peel-and-Stick Tiles
1. Plan Your Layout
- Start Point: Decide where to start; typically, for walls, you start from the top corner of the area.
- Dry Layout: Before peeling off the backing, lay out a row or section of tiles to plan the placement and ensure the pattern aligns pleasingly.
2. Installation
- Peel the Backing: Start with the first tile at your starting point, peel off the backing to reveal the adhesive, and carefully place the tile on the surface.
- Press Firmly: After placing each tile, press it firmly from the center outwards to remove any air bubbles and ensure a secure bond.
- Alignment: Keep checking that the tiles are aligned with your level or straightedge as you go. Misaligned tiles can be noticeable once the entire area is covered.
3. Cutting and Fitting
- Measure and Mark: Where tiles need to fit around corners, outlets, or fixtures, measure the space and mark the tiles to cut.
- Cutting: Use a utility knife and straightedge to make cuts. Be patient and make several gentle passes with the knife rather than trying to cut through in one go.
4. Finishing Touches
- Roll the Surface: Once all the tiles are in place, use a small roller to go over them. This will ensure they are firmly bonded to the surface.
- Seal Edges: In wet areas, like around a sink or bathtub, you might want to apply a thin line of caulk along the edges to prevent water from getting behind the tiles.
Maintenance
- Cleaning: Clean peel-and-stick tiles with mild soap and water. Avoid harsh chemicals and scrubbing pads that could damage the surface.
Peel-and-stick tiles are an excellent way to update your home’s aesthetic without the permanent commitment and expense of traditional tiling. With careful preparation and application, these tiles can provide a durable and stylish addition to your kitchen or bathroom, transforming the space with minimal effort and cost.
Frequently Asked Questions About DIY Home Improvements
What are some cheap DIY projects for beginners?
For beginners looking to dip their toes into DIY projects without a hefty investment, here are a few simple yet impactful ideas:
Paint a Room: Changing the color of a room can dramatically alter its appearance. A gallon of paint typically costs less than $30 and can transform a space.
Create a Mason Jar Organizer: Perfect for kitchens, bathrooms, or workspaces. All you need are a few mason jars and a piece of wood to mount them on.
DIY Wall Art: Use canvas, fabric scraps, or even old clothes to create personalized art pieces.
Refresh Cabinet Hardware: Replace old drawer pulls and knobs with new ones to update the look of your kitchen or bathroom cabinets.
Window Treatment: Sewing your own curtains can be a rewarding project that also allows for complete customization of your space.How can I update my living room on a tight budget?
Updating your living room without spending a lot involves focusing on cosmetic changes and DIY enhancements:
Repaint: Choose a fresh, new color for the walls. Often, a different shade can change the feel of the entire room.
Rearrange the Furniture: Sometimes, a new layout can make the room feel like a brand-new space.
DIY Pillow Covers: Sew new covers for your existing throw pillows in vibrant fabrics to add a pop of color.
Upcycle Furniture: Give old furniture a new look with some sandpaper and a coat of paint or stain.
Add Plants: Introduce greenery to liven up your space. Plants can be inexpensive and add a fresh vibe to any room.What are the best DIY projects for increasing home value?
Certain DIY projects can add significant value to your home, especially those that enhance its appeal or functionality:
Kitchen and Bathroom Backsplash: Installing a new backsplash is visually appealing and can be a selling point.
Upgrade Lighting Fixtures: Modernizing old light fixtures to more contemporary styles can change the perception of your space.
Landscaping: Curb appeal is crucial. Simple landscaping, like trimming hedges, adding mulch, and planting flowers, can boost home value.
Floor Improvements: Installing or refinishing floors can be more ambitious but significantly affect home valuation.
Smart Home Additions: Installing smart thermostats or smart locks can appeal to tech-savvy buyers and increase home functionality.How do I choose the right tools for DIY home improvements?
Choosing the right tools depends on the projects you plan to undertake, but some essentials include:
Cordless Drill: Versatile and crucial for a variety of tasks from hanging pictures to more complex furniture builds.
Hammer: Necessary for basic tasks such as driving nails, fitting parts, and demolition.
Screwdriver Set: A variety of sizes and head types will prepare you for assembling furniture, tightening hardware, and more.
Tape Measure: Essential for precise measurements in any project.
Level: Ensures your installations are perfectly horizontal or vertical. Start with these basics, and as your skills and project complexity grow, so can your tool collection.Can DIY home improvements really save money?
Yes, DIY home improvements can significantly save money, primarily because you eliminate labor costs, which can often be the most expensive part of a renovation. Additionally, DIY allows you to shop around for the best-priced materials and avoid the markup that professionals might add. However, it’s important to tackle projects within your skill set or those where learning as you go is feasible to avoid costly mistakes that could, in turn, increase your overall costs.
Conclusion: Building Value and Style
DIY home improvement projects not only enhance your living environment but also boost your home’s value. With creativity and effort, you can achieve remarkable transformations, proving that a tight budget doesn’t mean compromising on style or comfort.
References
- Investopedia’s guide offers insights into managing DIY home projects, emphasizing cost-effective strategies and the potential return on investment. Learn more from their article on essential DIY home projects.
- HGTV provides a gallery of DIY home projects that inspire creativity and practicality in home improvement efforts. Check out their diverse range of projects.
- Better Homes & Gardens outlines 25 home improvement ideas that each cost less than $150, making them perfect for budget-conscious homeowners. Discover these affordable remodeling ideas.


Home Crafts: Easy DIY Projects for Every Room
03rd May 2024[…] to emotional, making it an ideal activity for anyone looking to transform their home. Incorporating cheap DIY home improvement ideas into your crafting projects not only enhances your home’s appearance but also optimizes your […]
101 Festive Decor Ideas (Updated May 2024)
06th May 2024[…] decor ideas, including home crafts and DIY home improvement ideas, cover a diverse array of items and styles used to adorn living spaces during holidays and special […]
Top 10 Decorative Wall Art Ideas to Elevate Your Living Room
25th May 2024[…] Decorative wall art is more than just a means to fill up empty space on your walls; it’s a reflection of personal style and a powerful element in interior design. It brings character, warmth, and interest to any living space, transforming a plain room into a visually appealing haven. […]